STONEFLY PART 1 & 2
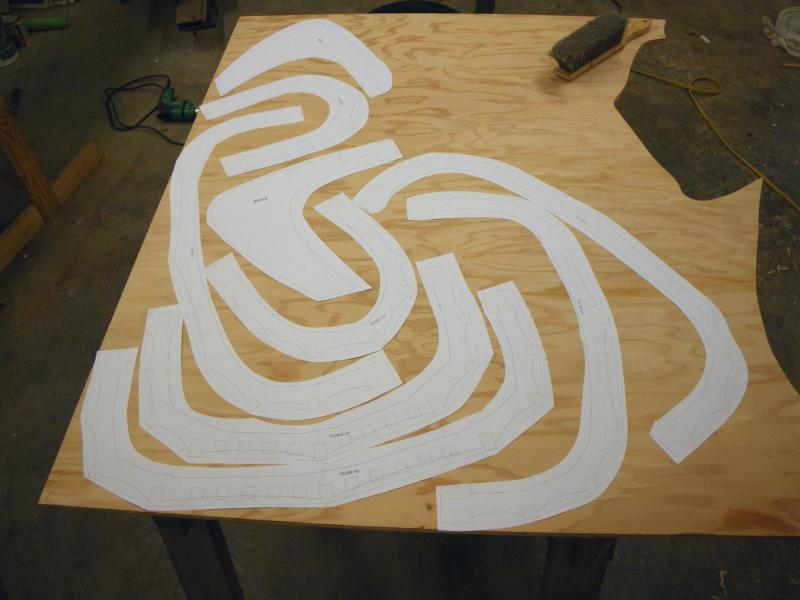
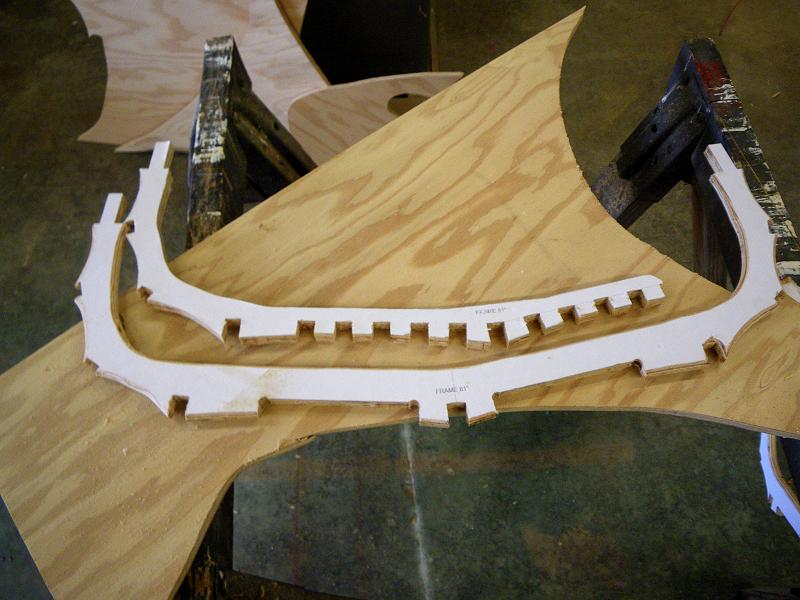
I got caught up on orders in the shop so I got back on Stonefly’s frames today. The more I look at them the more I convinced they going to have to be remade but more on that latter. I started cutting out the full sized patterns and arranging then gluing them on the the plywood. Then I rough them out with the saber/jig saw.
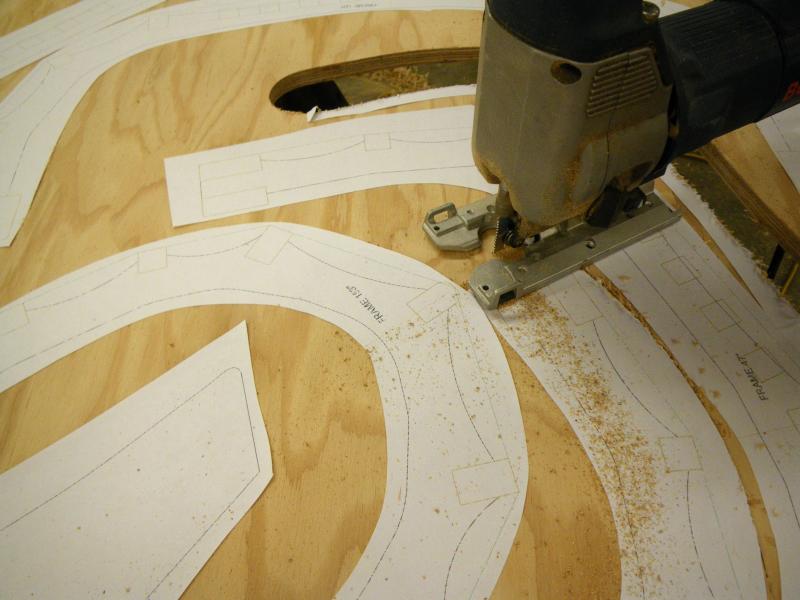
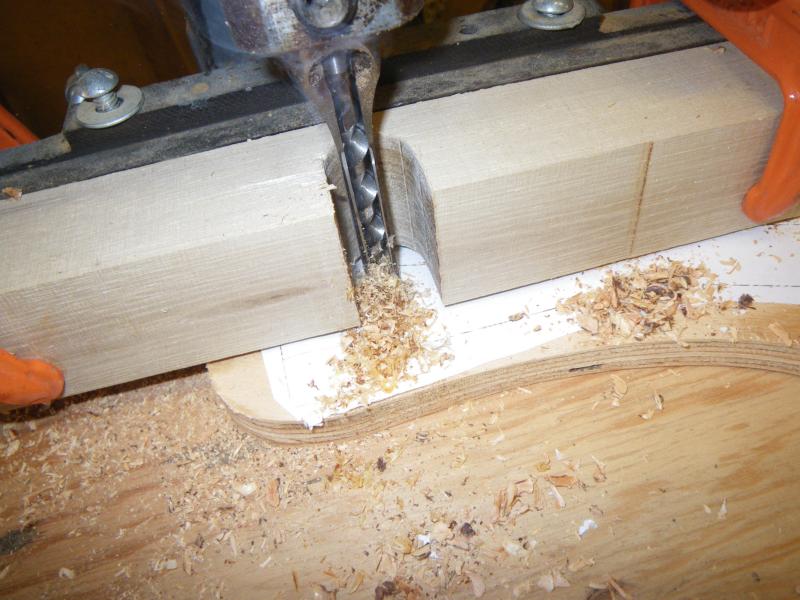
I have a mortiser in my shop so I take the rough cut pieces to it and cut the slots for the stringers. You don’t need one but if you have one by all means take advantage of it.
Since I am much better with the bandsaw than the jig saw I prefer to cut the frames on it. I have a lot more hours using it so I am more accurate cutting with it.
Here you can see the frames ready for the edges to be rounded over and sanded.
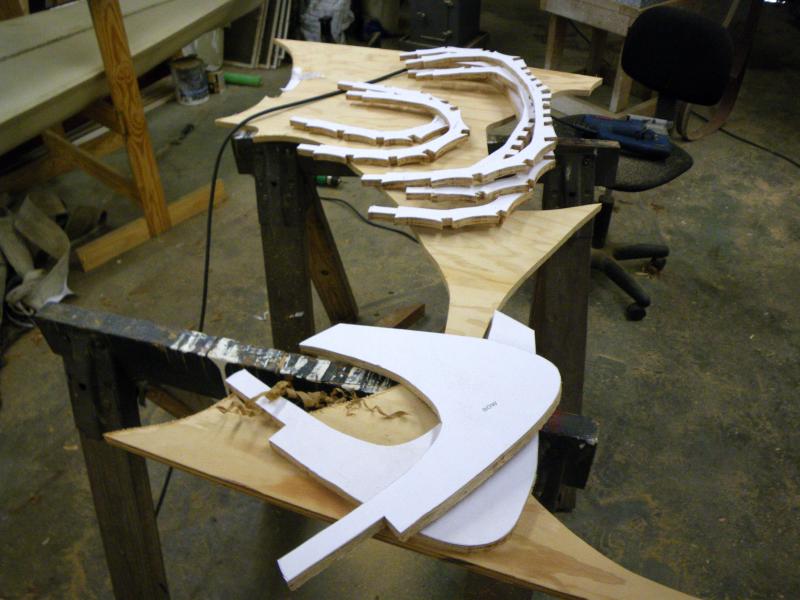
Now I have a big concern about the frames. After holding them in my hand I realize they are fragile, or at least feel it. Since there is no deck on the boat the frames with the slots of floor slats flex a lot and I am pretty certain that once I go to put gunwales in place that one of the frames is going to break from the pressure. If I could get the boat together and get a thwart in place and the guwales blocked out I believe it would work. But I have a lot of concerns at this point.
I can put in temporary braces at each frame while I build it but there is still the chance it will break something once they are removed. That would be a lot of work to loose. Obvious answer is to redesign the frames and make them taller and therefore stronger. But that was something I was trying to avoid. One of the drawbacks of this style of construction is the frame ‘dirty’ up the inside of the boat.
I guess it’s time to sit in the moaning chair and rock for a while and think this one through before I go any further.
STONEFLY PART 3
Well, sometimes you just have to back up and start over. Bottom line, I goofed on the frames. Once I got them cut out and looked at them I knew they were to flimsy. I broke one by hand with just confirmed it. So I went back the computer and redesigned them. Even though I like the slat floors I decided plywood floors were a simpler idea. Less cutting and I could round over the edges so I didn’t have a sharp corners either.
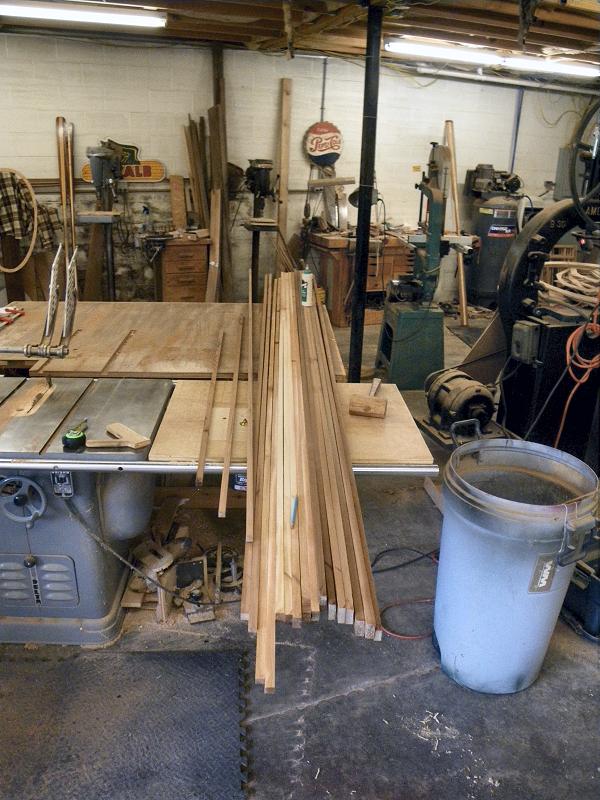
Next I planned the board down to size and then ripped them into strips. These were cut on the scarf jig and then glued into the lengths I needed.
I started assembling the frame and I was surprised at how fast that went. By the end of the day I had the frames in place and almost half of it lashed.
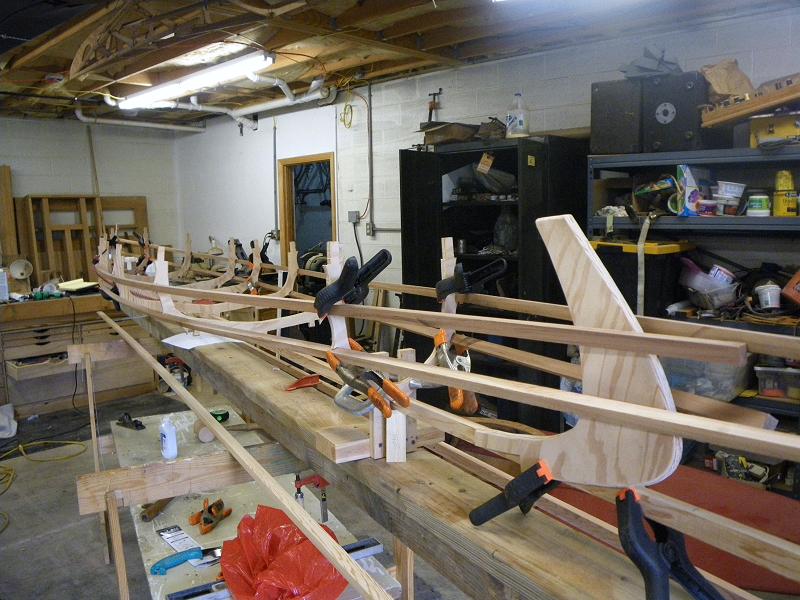
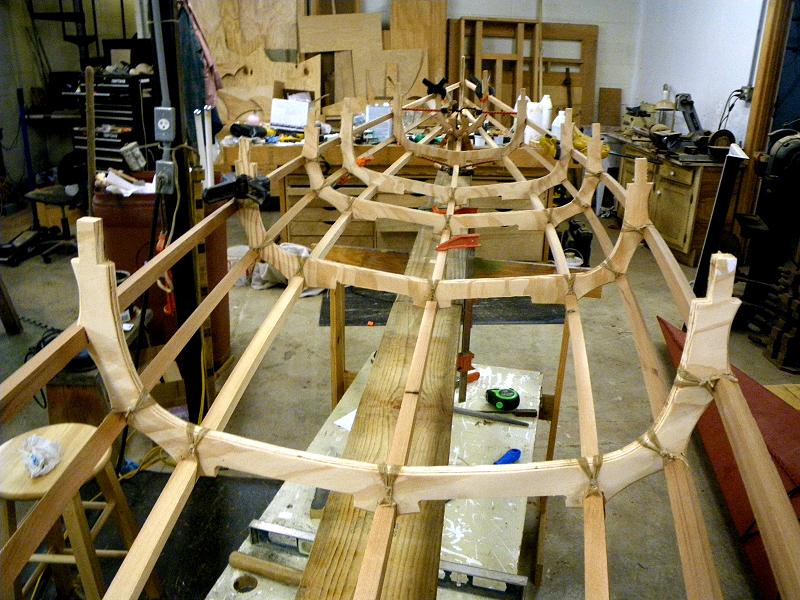
There is still a lot left to do but I feel good about what I have gotten done so far. It has gone pretty fast but I am sure that is about to change.
STONEFLY PART 4
Today I finished up the ends of the boat and have all the frames lashed in place. First step was marking and trimming the ends of the stringers. I marked them with the Bow/Stern piece in place and then cut them to length as shown here.
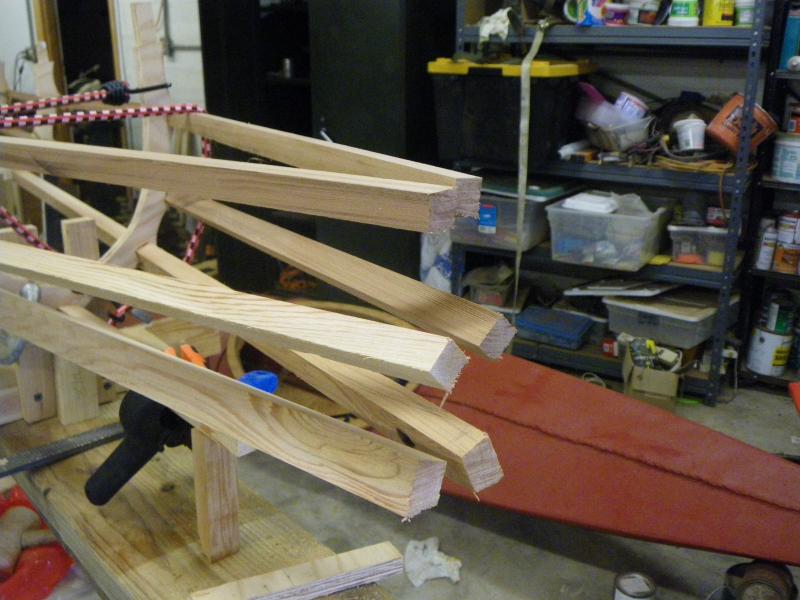
Since the cedar is so soft I just take a larger rasp and form the flat on the ends. You can see what you want it look like. These are not quite done and and you see they are not even. But it is close.
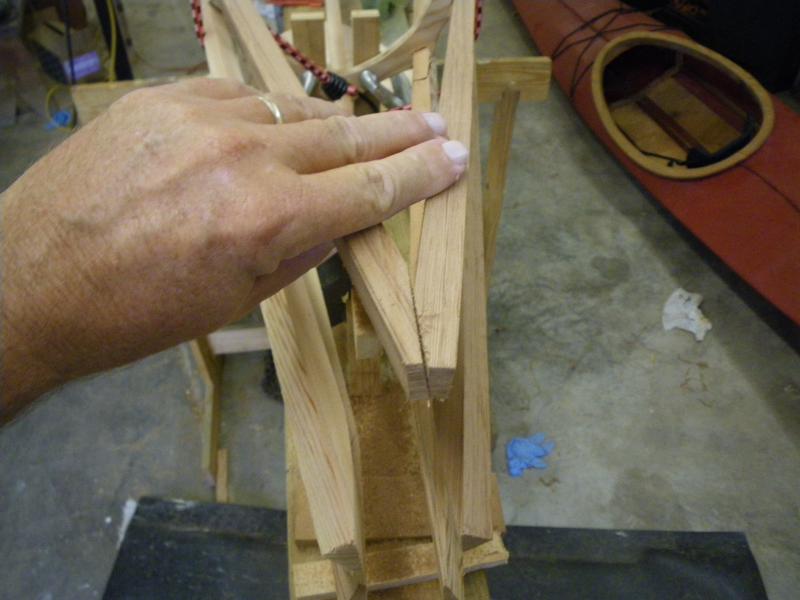
Using the t-shirt stretched over the frame I look and see where I need to trim and reshape to get a smooth transition from the stringers to the end. Again I use the rasp and/or a block plane to quickly rough them to shape. Some 80 grit sandpaper to smooth up the rough surfaces then. Each stringer is shaped differently and these were very close to being finished. Using a t-shirt stretched over these helps to show you where you need to shape. I probably spent an hour getting this to look right but it is time well spent!
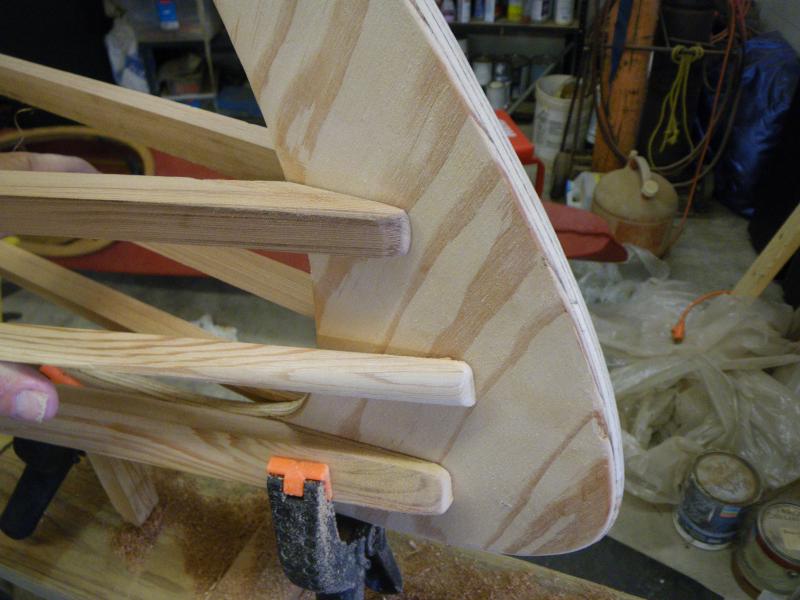
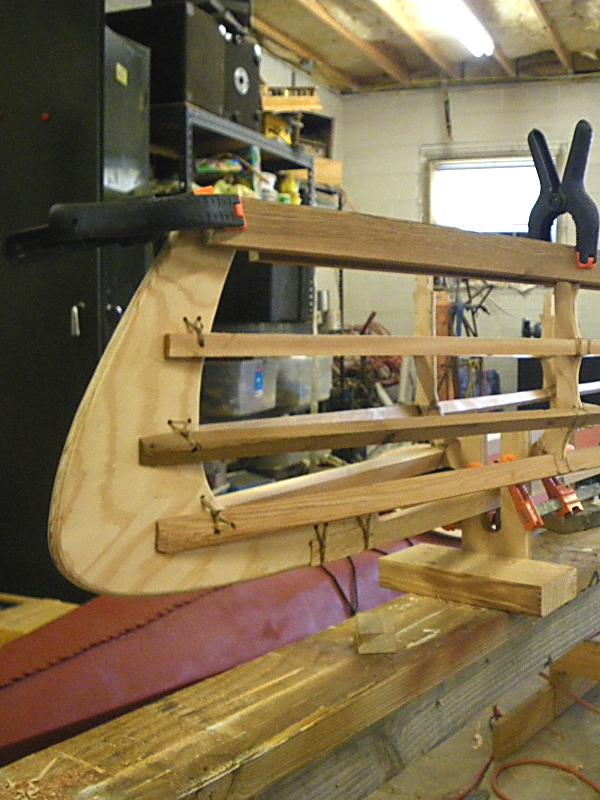
Once the ends were lashed in place I started to work on the Gunwales. But I found the frame was flexing a lot and distorting the shape of it. Newt one I will mount the center fame too. That will help but meantime I decided to fit the floor boards in place, They should fit snug in the cutouts and I think they will make the frame a lot more rigid and stop the side to side flex.
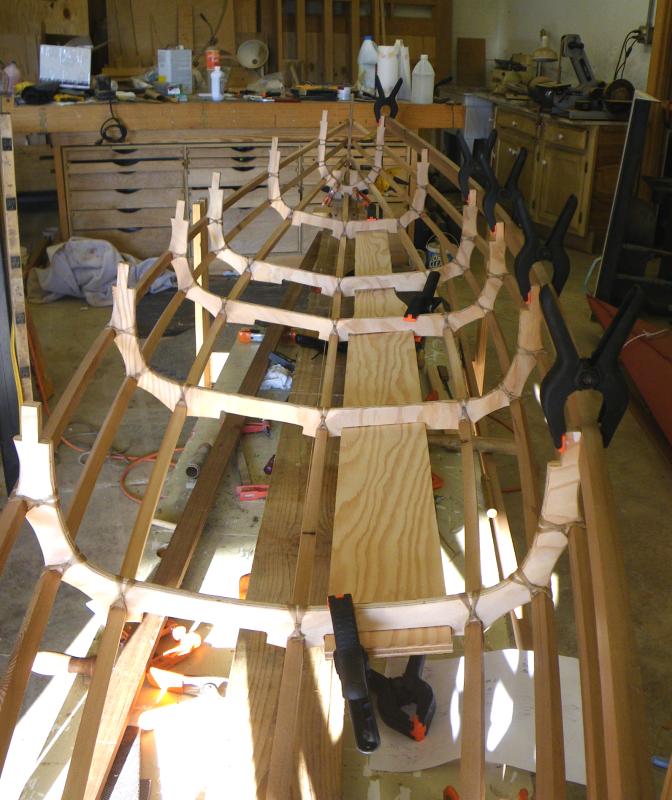
There is a little bit of twist in the floor boards and once they are lashed in place I am sure that is going to add a good bit of rigidity.
I clamped my rough stock for the gunwales in place and they look ‘heavy’. Actually they look way to big on such a small boat. They will be way stronger than I need so I going to have to thin them down some to make the size look right on this small of a boat because looks are important!
STONEFLY PART 5
I started on the Gunwales today. After a dry fit I could see the frame bending so I clamped a scrap piece onto three frames to hold them in shape while building the Gunwales.
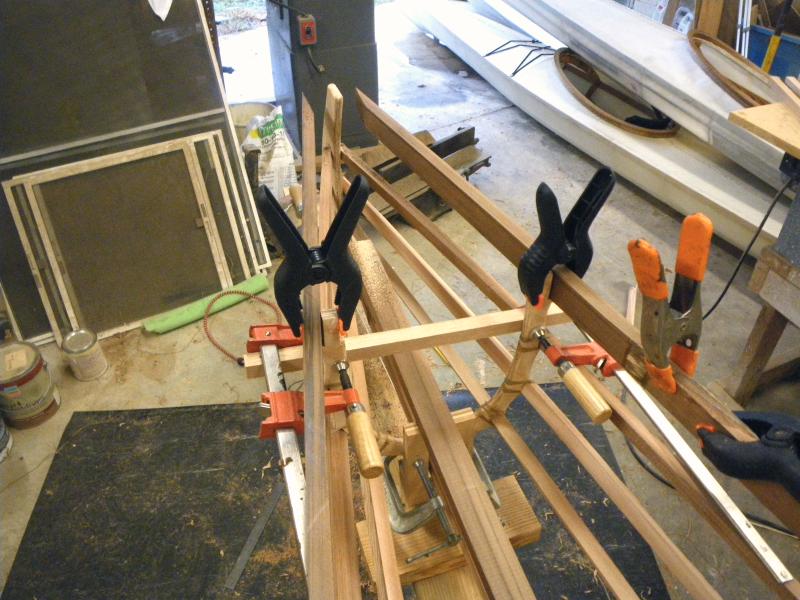
Temporary clamps to hold the frames in place
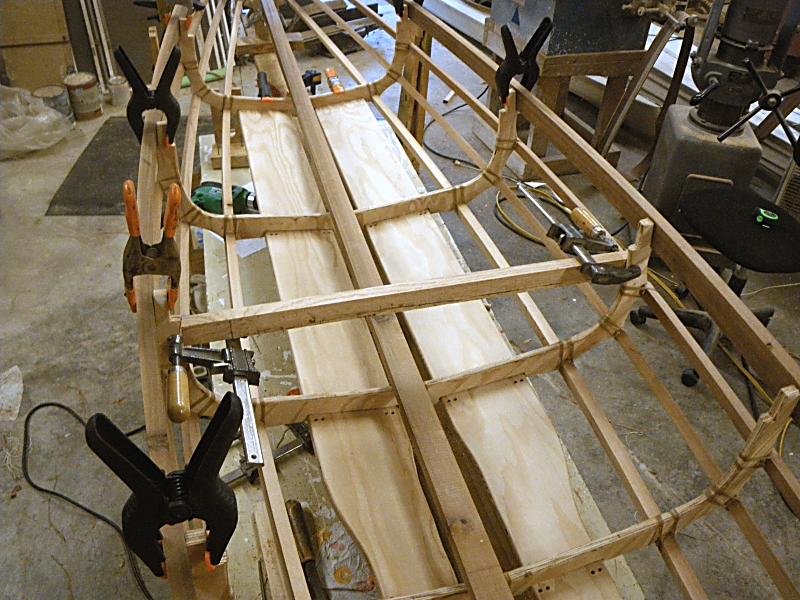 Temporary clamps to hold the frames in place
I had a lot of trimming on the tops of the frames to allow for the curve in the gunwale. I then cut some scrap blocks to get an idea of how I wanted it too look.
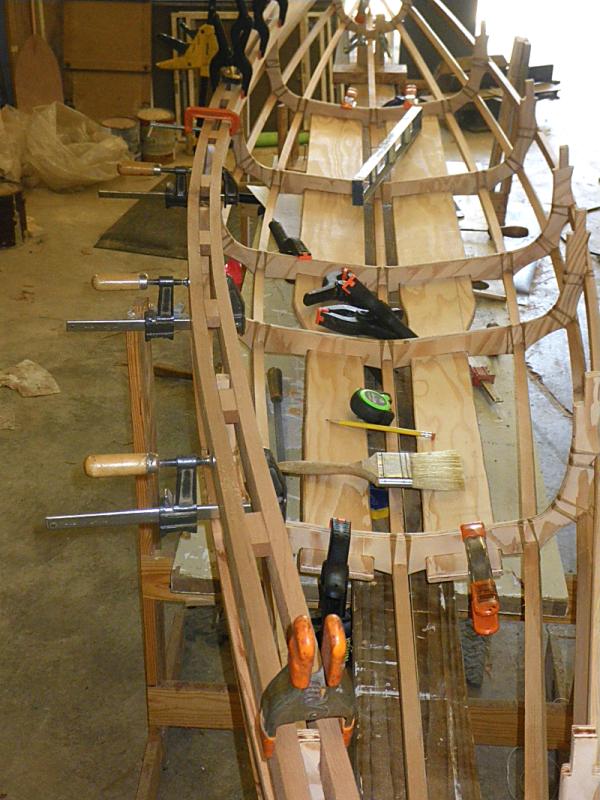
Dryfit to work out the spacing

Then I glued everything up. I have A LOT of clamps in my shop. I am to the point I don’t buy them anymore unless they are really cheap, but I had to search around the shop and scrounge up all my small clamps that were hidden and just laying around. For the first time in a long time I could have used a few more small clamps!
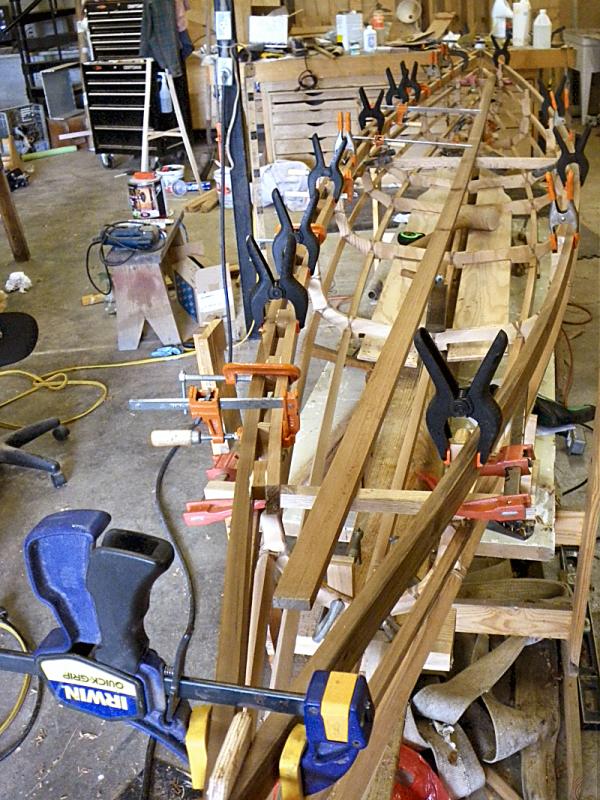
Clamps and more clamps
STONEFLY PART 6
Today I installed the Port (left) Gunwale. I did this one a little differently and it was much easier. I did a dry fit to get my spacing right and make sure it matched the other side. Once I was happy with it I marked the location of the blocks and took it apart. Then I glued the spacers in place along with the gunwale.
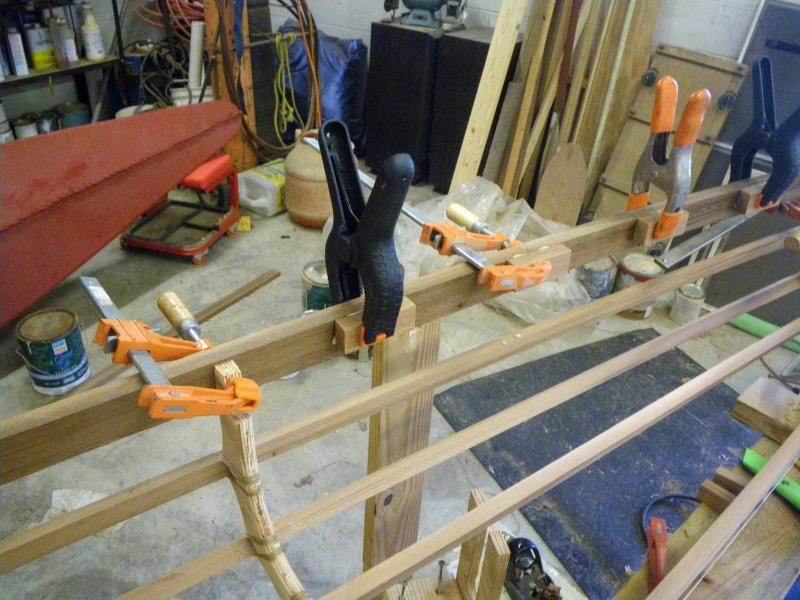
While the glue dried I started working on the Starboard side gunwale. I had to do a lot of planing with my block plane to even up the top of the Gunwale. Because of the slight amount of ‘Tumble Home’ the inside of the gunwale is actually lower than the outside edge. So once glued up there was a stair step effect. A sharp block plane is my tool of choice to take care of that. You could use something like a belt sander but it just helps you ruin it faster. While a plane is slower it allows you to slowly get to where you want with less chance to major mistake. And because it rides on the tops of the blocks it keeps them pretty fair when your done.
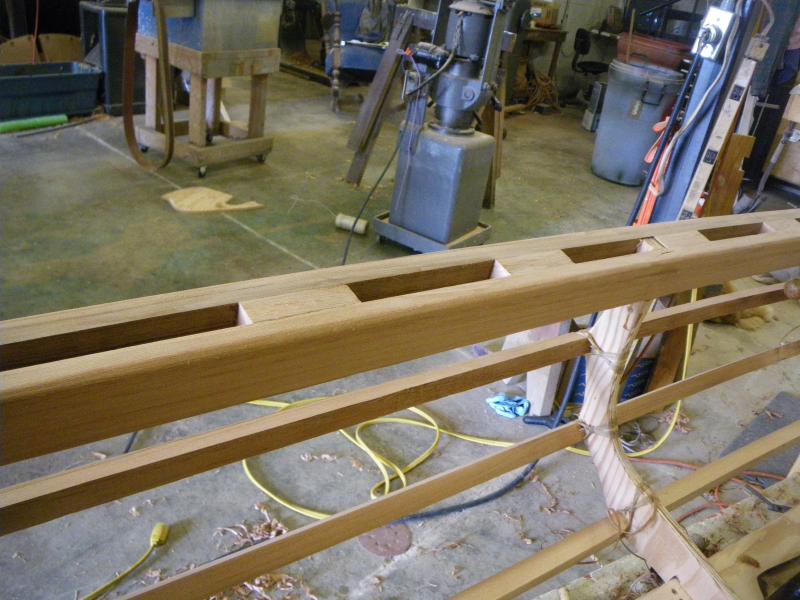
I didn’t want a sharp edge inside the boat so took a plane and broke the corner and did then hand sanded it to nice rounded shape. I think it turned out pretty well. Should look really good once it is varnished.
Once the glue dried I removed the clamps and this is what I had. It has to dry for 24 hours before I can do any work on the glued joints though. I have some paying work to do so it may be the weekend before I can spend any time working on the canoe.
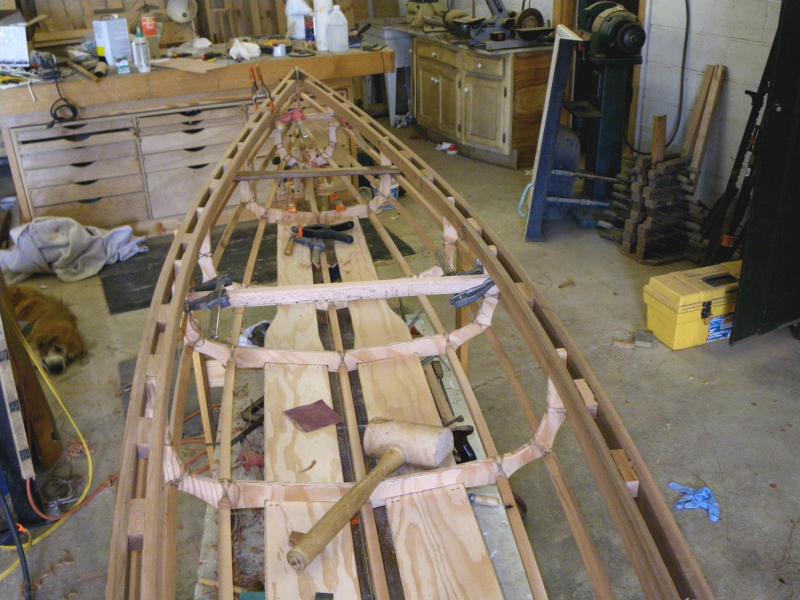
While the glue was drying I cut a couple of thwarts. I may not need the one behind the seat, depending on how I decide to mount the seat, but I would rather be on the safe side and it be a bit overkill strength wise in case it slams into some rocks in the current. And that will probably happen sooner or latter.
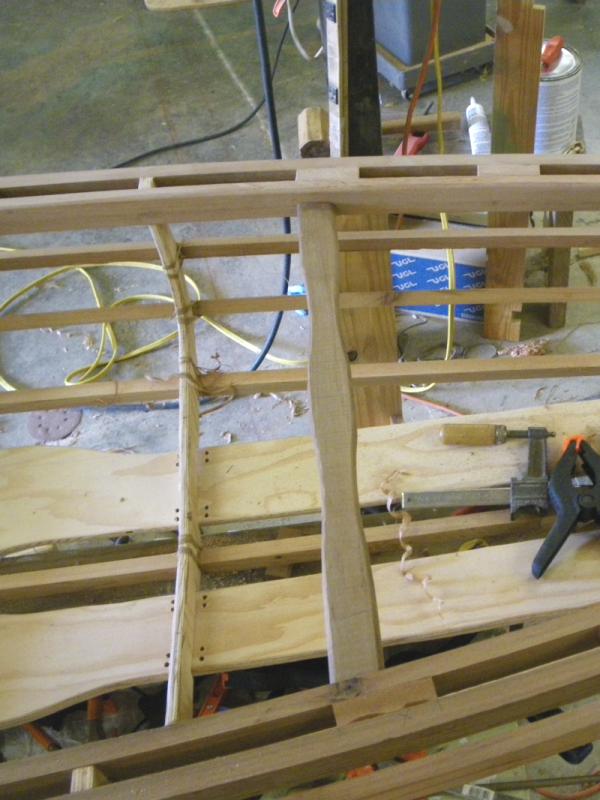
There is not a lot left to do at this point. I need to finish the other Port gunwale. Add some breasthooks in the ends and do the final sanding. I want to apply a finish to the frame before skinning but I am not sure what. I am thinking seriously about varnish. Once that is done I will just need to lash in the floorboards and the it will be ready to skin.
STONEFLY PART 7
I have been a little slow lately due to my clumsiness. But the ankle is better and I managed to get in the shop and do a little bit. When I left of I had the frame pretty much finished and ready to start skinning so that is where I will pick up.
I draped the skin over the boat. Clamped it one end and then pulled it snug on the boat and clamped the other end. I add a row of pushpin’s down the center to keep the fabric from twisting later on in the skinning process.
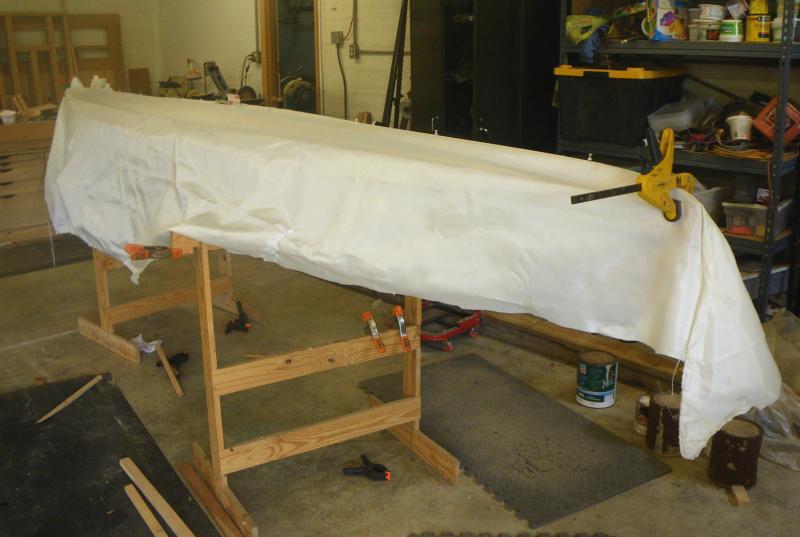
I roll the boat over continue to ‘snug’ up the skin and clamp in place. This is not necessary but it gives you an idea of what you have done and it does make the next steps somewhere easier on a canoe I think.
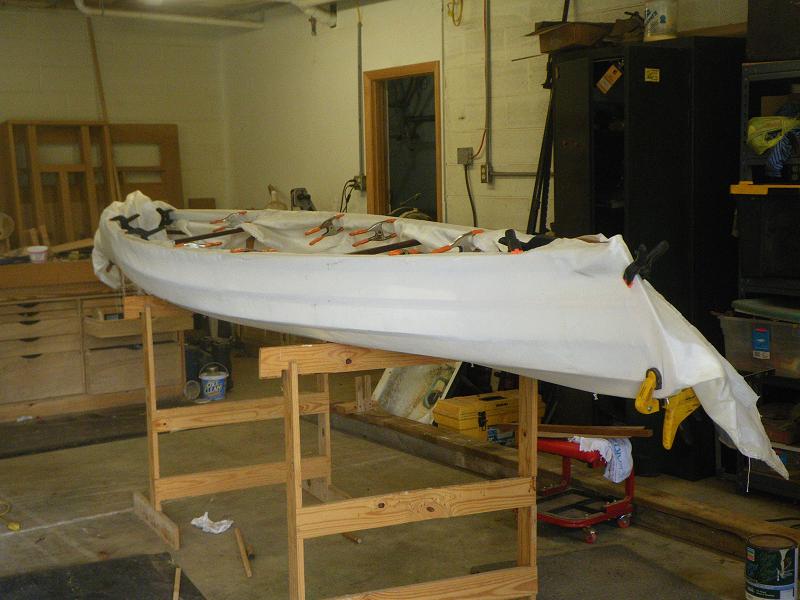
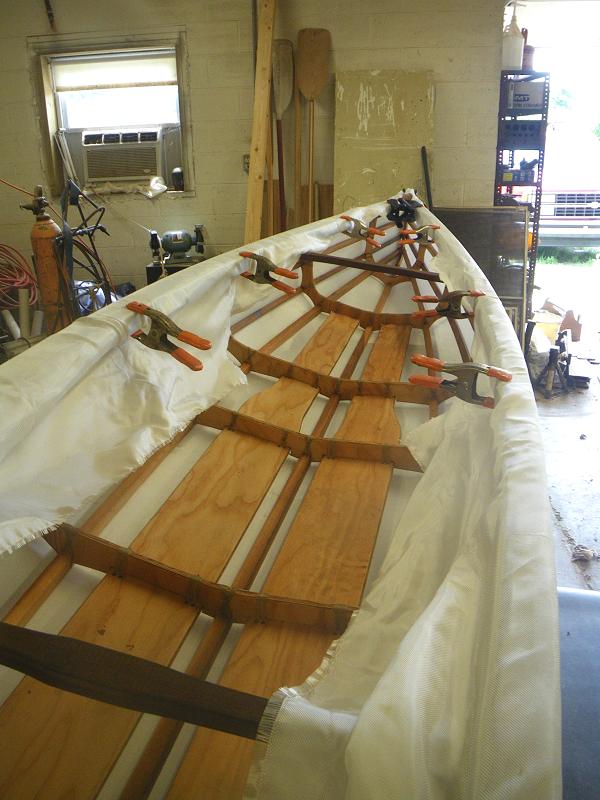
I was using a left over piece of fabric from another job so I wanted to make sure it will fit no problems. Once I was happy with that I trimmed the sewed around the ends.
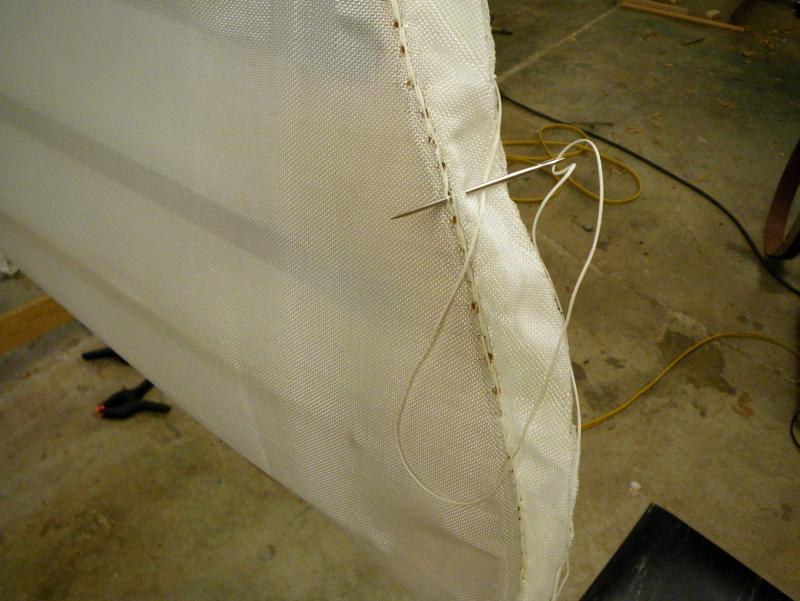
Then take the staple gun and staple the skin along the gunwales.
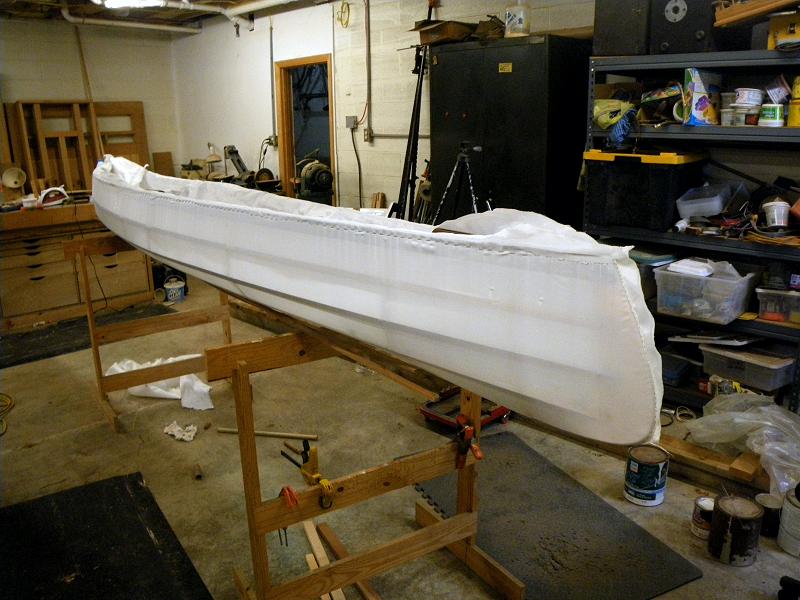
With excess skin timmed off this is what you get. It finally looks like a boat!
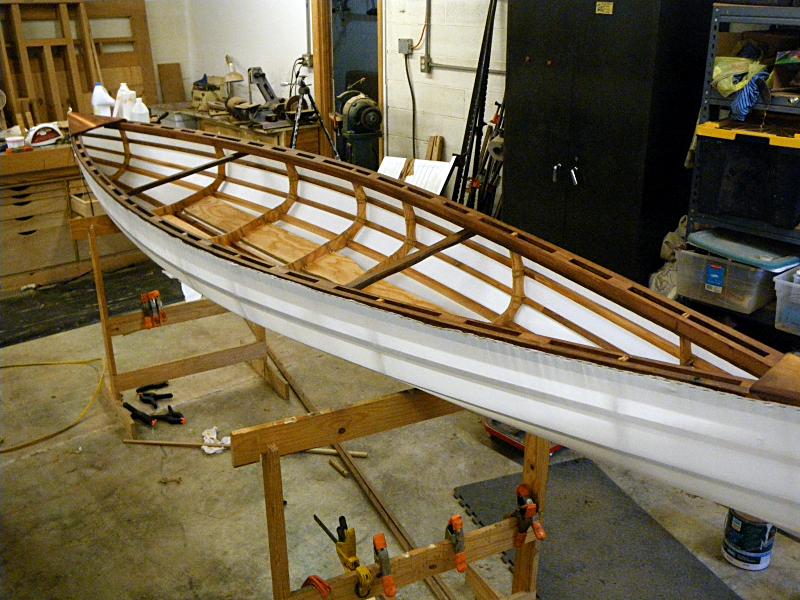
I need to so the finish stitch on the ends of the boat to make that look nice. Then I will shrink the skin, even thought this one is pretty taunt as it is. Then it’s time for some waterproofing and it will be ready for the water soon.
STONEFLY PART 8
I have been a little slow lately due to my clumsiness. But the ankle is better and I managed to get in the shop and do a little bit. When I left of I had the frame pretty much finished and ready to start skinning so that is where I will pick up.
I draped the skin over the boat. Clamped it one end and then pulled it snug on the boat and clamped the other end. I add a row of pushpin’s down the center to keep the fabric from twisting later on in the skinning process.

I roll the boat over continue to ‘snug’ up the skin and clamp in place. This is not necessary but it gives you an idea of what you have done and it does make the next steps somewhere easier on a canoe I think.


I was using a left over piece of fabric from another job so I wanted to make sure it will fit no problems. Once I was happy with that I trimmed the sewed around the ends.

Then take the staple gun and staple the skin along the gunwales.

With excess skin timmed off this is what you get. It finally looks like a boat!

I need to so the finish stitch on the ends of the boat to make that look nice. Then I will shrink the skin, even thought this one is pretty taunt as it is. Then it’s time for some waterproofing and it will be ready for the water soon.
STONEFLY PART 9
Still going slow on this one but the ankle is better and getting to where I can spend more time in the shop.
The next step in the process was to do a Whip Stitch on the ends of the boat to finish off the ragged ends of the fabric. I forgot to take photos as I did this. I was working on a video of the process for some future projects.
I am still researching the options for paints on Dacron fabrics. So I decided to stick with the old standby, Rustoleum, because I know it works and works well. The problem with Rustoleum is the color choices are limited to say the least. Add to that the the local suppliers don’t even stock all the colors they offer! I had been thinking about a tan, among other colors and noticed they had a ‘Sand’ color. I figured if nothing else I could prime the boat with it and if I didn’t like it I could put a color over that. Once I got a coat of ‘sand’ on Stonefly and stood back, I really liked the way it contrasts with the dark wood on the gunwales.
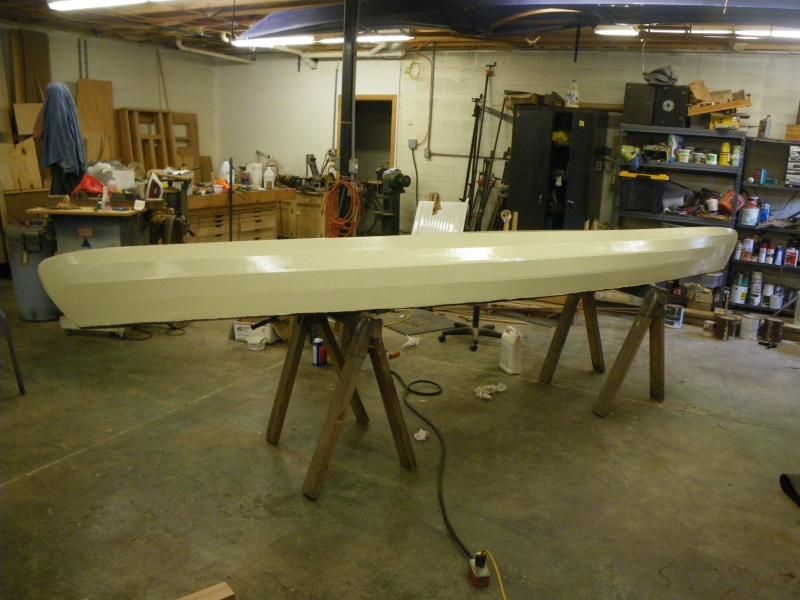
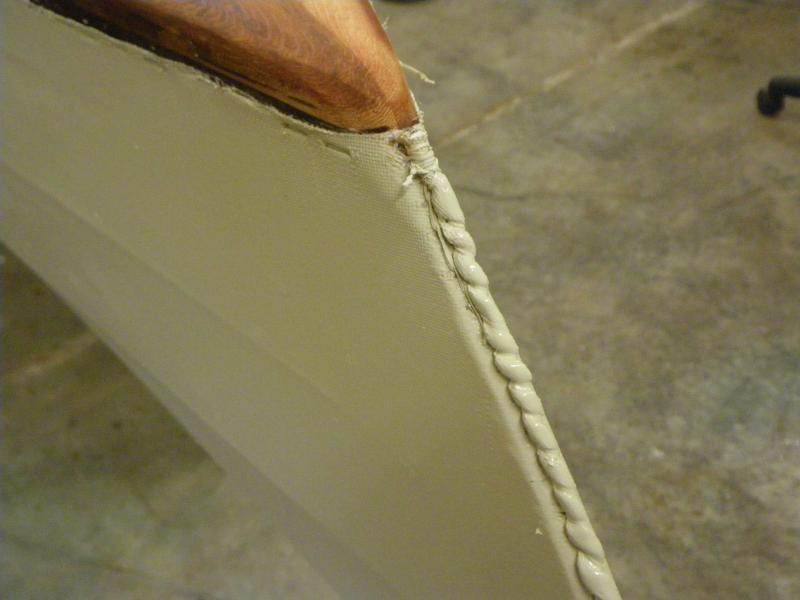
You can see the whip stitch on the end of the boat after I painted it. You could probably staple the skin on the ends and add a strip of some type to cover the staples. I know you can get brass ‘Canoe’ rub strips. If you let it run down under the boat it would probably be a good looking and durable option. Trimming the fabric might be difficult though.
Even thought it is not finished I wanted to test it and see how many leaks it had. And I am not kidding either. Often times you have small pin holes you can not see and when you put the boat in the water they will start to seep, not really leak but just a small seepage of water comes through. I took it to the pool along with some shop objects for a seat(s) so I could try different seat heights and see where I need to mount it at.
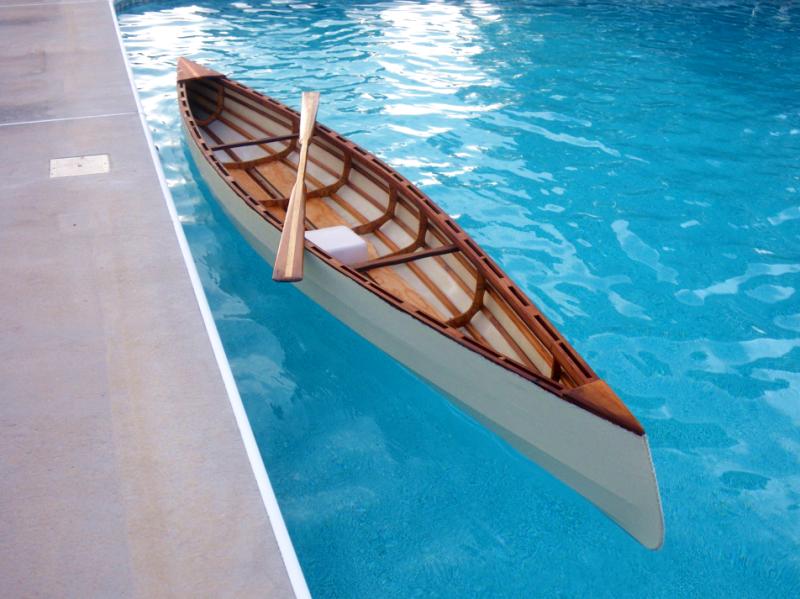
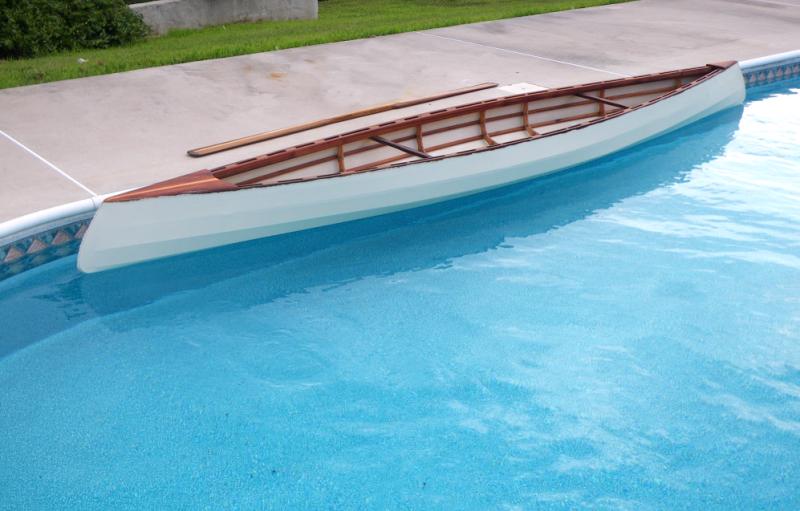
I was surprised that I only had a couple of spots that seeped, or at least that is all I saw. I only had two coats on paint on it. I will just give the bottom another light coat of paint and that will take care of it.
I got an idea of my seat height. The boat has a low stability level for a canoe so I will start with it mounted low and I can raise it up if I want. I couldn’t paddle it around in the pool but I did try to turn it some and I didn’t turn as easy as I had hoped, but I would rather it do that than be too loose and have no tracking. Since I have never designed a canoe before, I tried to err on the side of tracking.
What’s left? I need to build and install the rubrails along the gunwale. I need to settle on a seat for it and install it. As far as I know, that is will finish it.
I am just having a hard time deciding on a seat. I need a backrest and I don’t want an ugly padded seat in this boat. I am leaning toward wicker but the seat back is the problem, well the cost. I probably have less than $200 in this boat since most of the materials were leftovers from other projects. I hate to spend $12r or over half the cost of building the boat on a seat!
STONEFLY PART 10
LAUNCHING DAY
Yesterday I spent a few hours putting on the rub rails on the boat. Pretty simple matter of just drilling holes and screwing them to the Gunwales. I finally decided on a seat, I built a slat wooden bench and just let it rest on the stringers for now. I am going to mount it differently latter but I wanted to get this out of the shop and on the water.
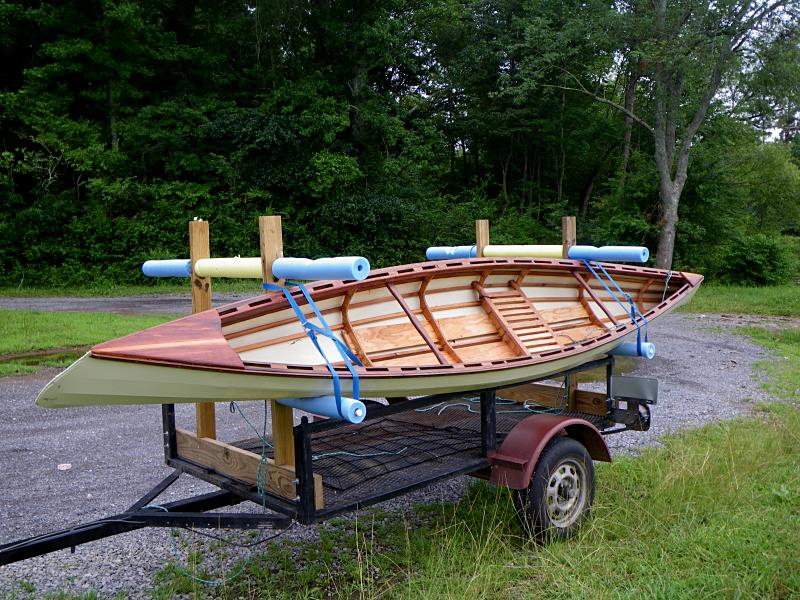
This morning I put a coat of Tung Oil on the rub rails and seat and loaded it on the trailer and headed to little used ramp and as I hoped I was the only one there. So I unloaded Stonefly and slide her into the water for her maiden voyage.
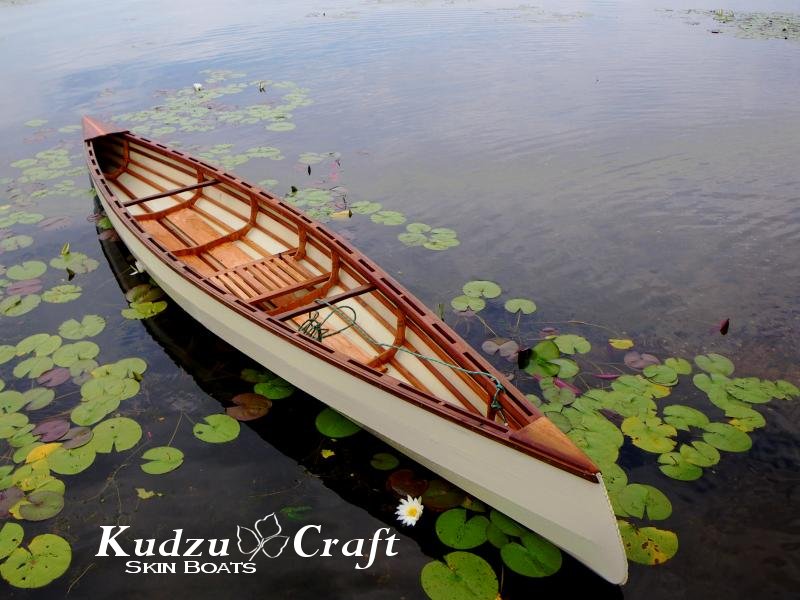
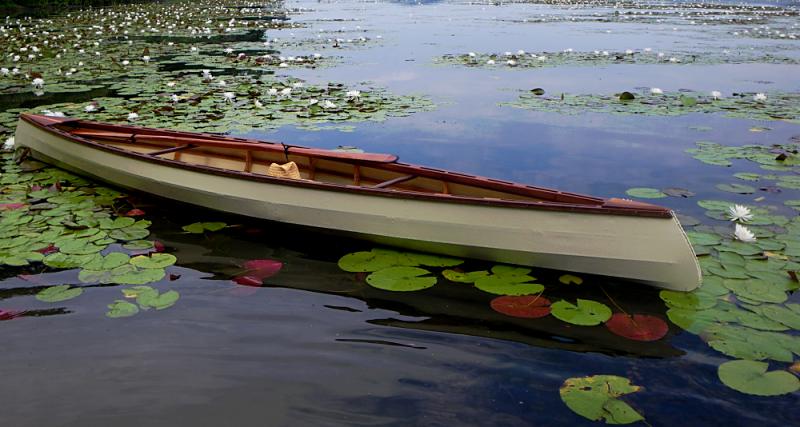
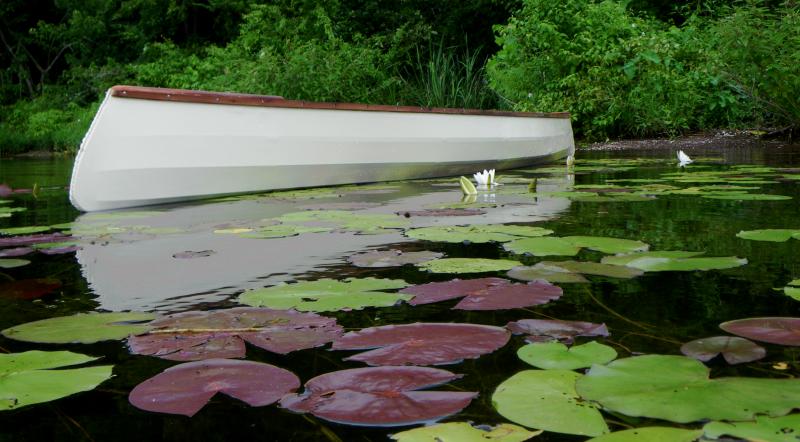
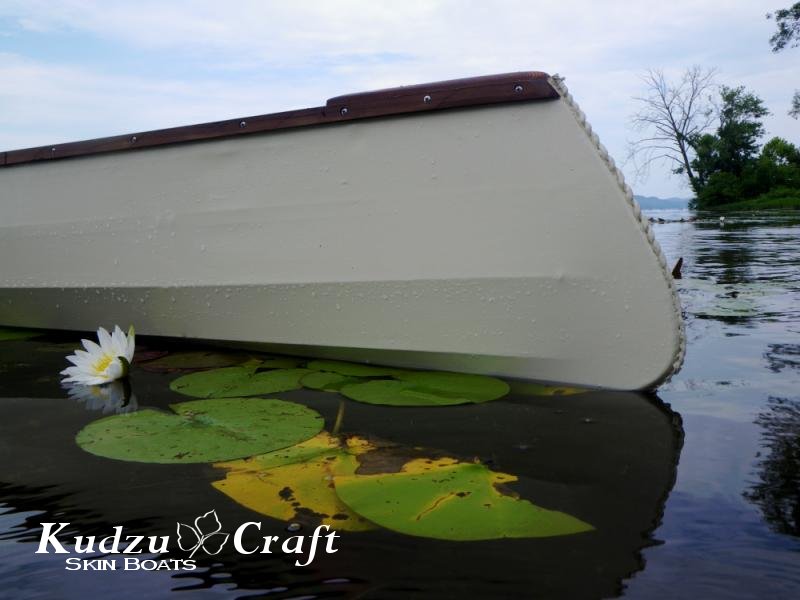
The first thing I noticed about paddling it is it is no kayak! First impressions were it was a barge. Of course compared to the kayaks it is noticeably slower. But the Greenland paddle I was using wasn’t a good match to a canoe either. Checking my GPS I found I cruised around 3.5 mph which isn’t as slow as it felt. And while I don’t have anything to compare it to, I suspect it is actually is far from slow for a canoe.
Next thing I notice is how stable and comfortable it is. This is like going from a Sports Car to a Sedan. Lots of leg room. Plenty of room for the tackle box behind me. A cooler would fit no problem. The seat height is comfortable and the boat is VERY stable. So stable I think I am going to raise the seat. I fished a little and it fine as is. But I think the higher seat would be an advantage for fishing.
I found a stadium seat in the garage so I just put there in there to have a back rest. It slides around a little but overall it worked pretty well. It’s simpler than building a back rest so for now it will work.
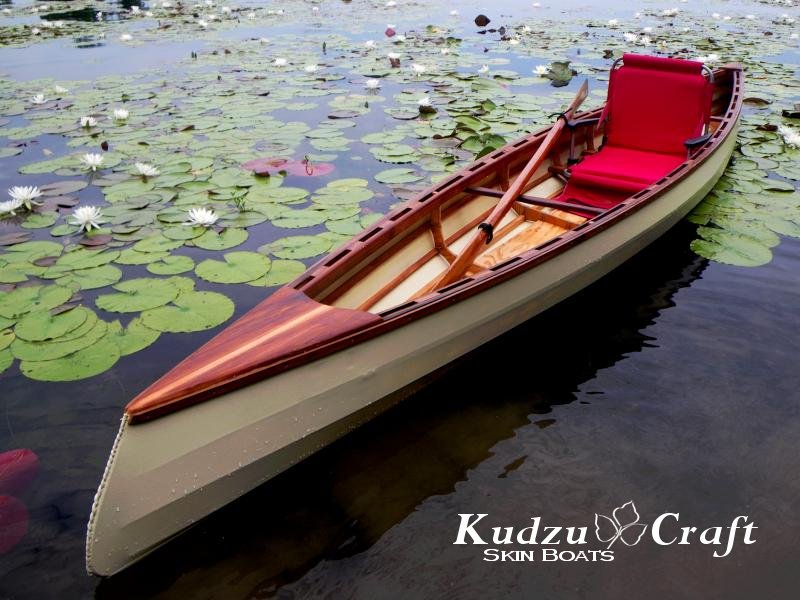
The one area I was disappointed in was it tracks a little on the hard side. This is nice out on the open lake when paddling down to my fish hole, but I really wanted a boat that would turn easy for use on the creeks and this one doesn’t. But I made a conscious choice when designing it to be conservative in this area. I didn’t want it loose like a white water boat. Once I got the skin on I could see the bow was more ‘V’ shaped than I expected so this is not a huge surprise. Other than that I was pretty well pleased.
Front thwart feel in an almost perfect location. I just lean forward and lay my rod with the tip under the bow and the handles lay on the thwart. I will probably go back and add a bar across the first frame to keep the tips off the bottom of the boat so they don’t tangle with each other. I could even make it part of the frame on the next one. I had one lure catch on a lashing. There is no way you can reach into the bow without destabilizing the boat. But that is an easy fix.
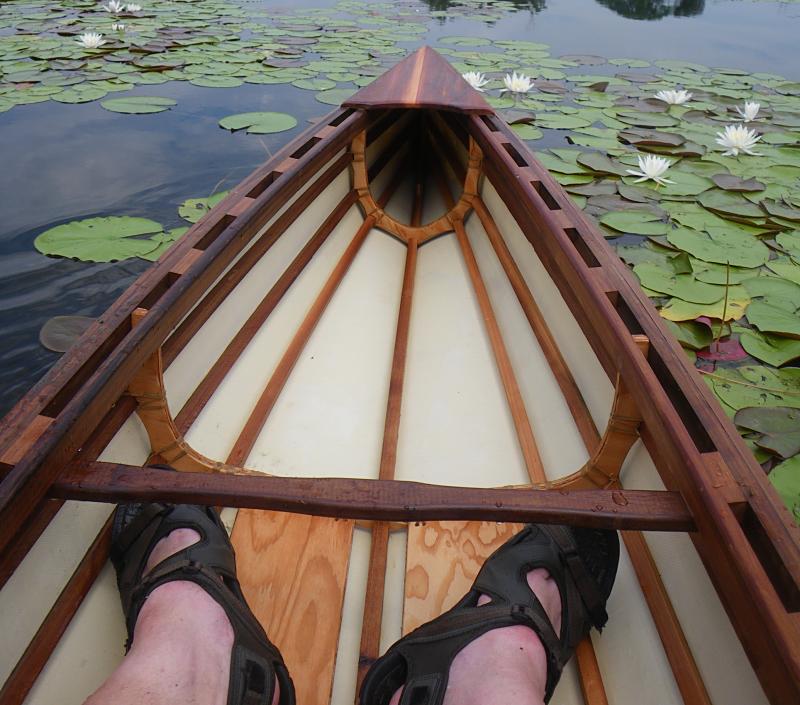
So over all I am pretty happy with it. I see a couple of things I will change in the plans but they are pretty minor. If I were to build another one for myself I would flatten the bottom a little bit and make the bow less ‘V’ shape to loosen up the tracking. If you were to use it on larger water you probably wouldn’t want to change it.
But I was impressed enough that I am considering offering plans for this boat. I designed and built this to be my boat with no plans to market it. But after paddling it I was impressed enough to reconsider that. With a few changes this might just end up in my store.


